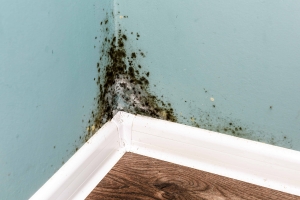
10 Tips to Prevent Strenuous Mould Removal Process in Brisbane

Preventing mould in your home is crucial for maintaining a healthy living environment and avoiding costly repairs. Here are ten detailed mould removal processes, with expanded explanations, to help you control indoor moisture and prevent mould growth. Following these ten tips can save you from the stress of mould removal and ensure a safer home.


1. Identify and Address Problem Areas in Your Home


Thorough Home Audit

Conducting a thorough audit of your home is the first step in mould prevention. Identify potential problem areas where moisture accumulates, as these areas are prime candidates for mould growth. This might include checking basements, attics, crawl spaces, and other areas prone to dampness.

Basement Issues

Basements are particularly vulnerable to moisture due to their below-ground location. Moisture can seep in through foundation walls, floors, or even through small cracks. Inspect your basement regularly for signs of leaks, condensation, or overall dampness. Installing a dehumidifier can help control humidity levels, which is crucial for preventing mould growth. Additionally, consider waterproofing the basement walls and floors to create a barrier against moisture. If your basement has carpeting, consider replacing it with moisture-resistant flooring options such as tiles or vinyl, which are less likely to retain moisture.

Condensation on Windows
black-mould-on-wall-closeup

Condensation on windows, especially during colder months, indicates high indoor humidity levels. This moisture can accumulate and lead to mould growth if not addressed. Ensure proper ventilation by opening windows periodically to allow fresh air circulation, this way you can avoid mould removal during colder seasons. Installing double-glazed windows can also help reduce condensation by providing better insulation and maintaining a more consistent indoor temperature.

Roof and Gutter Maintenance

A well-maintained roof and gutter system are essential for preventing water infiltration into your home. Check your roof for leaks, missing shingles, or other signs of damage that could allow water to enter. Ensure that gutters are clean and functioning correctly, as damaged or clogged gutters can lead to water seeping into the roof and walls. Regularly clean your gutters to remove leaves, debris, and other blockages that can cause water overflow. Repair any roof leaks promptly and ensure that gutters direct water away from the house’s foundation.

Persistent Leaks

Address any persistent leaks immediately, whether they come from plumbing or external sources. Even a small leak can cause significant moisture build-up over time, leading to mould growth. Regularly inspect areas under sinks, around toilets, and near appliances like dishwashers and washing machines for signs of leakage. If you find a leak, fix it promptly to prevent further moisture accumulation.

2. Use Mould-Resistant Products


Building Materials

When building or renovating, choose mould-resistant materials. Mould-resistant drywall, also known as green board, is a good option for areas prone to moisture. This type of drywall is designed to resist mould growth better than traditional drywall. It’s particularly useful in high-moisture areas such as bathrooms, laundry rooms, basements, and kitchens.

Mould-Resistant Paint

Use paints that contain mould inhibitors, especially in high-moisture areas like bathrooms and kitchens. These paints create a surface that mould finds difficult to colonize. Regular repainting can help avoid stressful mould removal process.

Mould-Resistant Insulation

Consider using mould-resistant insulation in walls, especially in basements and other moisture-prone areas. This type of insulation can help prevent mould growth within wall cavities by reducing the potential for moisture accumulation.

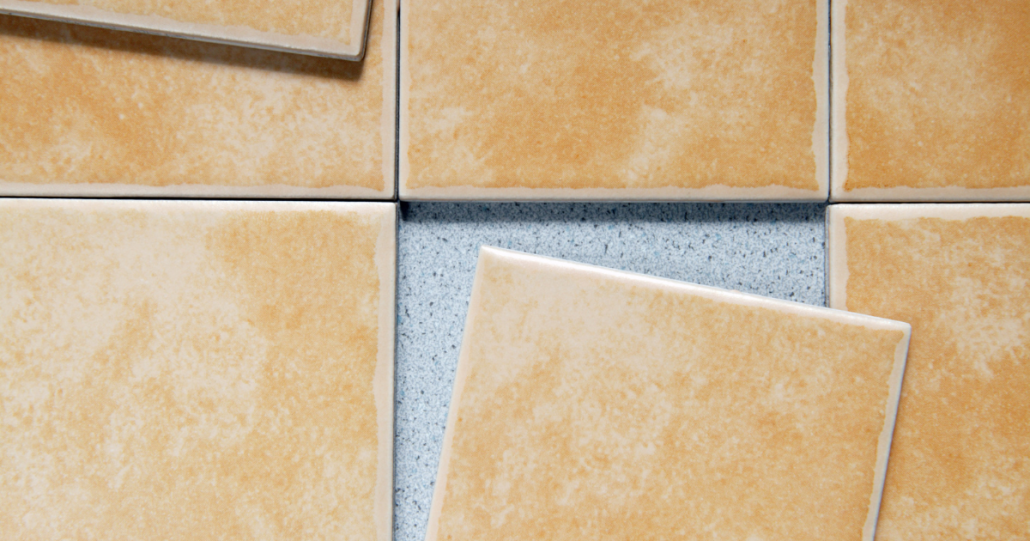
Sealants and Caulking

Use high-quality sealants and caulking in bathrooms, kitchens, and around windows and doors to prevent moisture ingress. Regularly inspect and replace any damaged or deteriorating sealants to maintain a watertight seal. This practice helps prevent water from seeping into walls and floors where it can cause mould growth.


3. Dry Wet Areas Immediately


Prompt Drying

Mould needs moisture to grow, so it’s crucial to dry wet areas within 24 to 48 hours. This includes dealing with spills, leaks, or water ingress from rain as soon as they occur. Quick action can prevent the establishment of mould colonies, which are more challenging to remove once they take hold.

Post-Flood Action

If you experience flooding, it’s essential to act quickly. Remove water-damaged items such as carpets, furniture, and bedding that cannot be completely dried. Use fans, dehumidifiers, and wet-dry vacuums to speed up the drying process. In severe cases, you might need to call a professional water damage restoration service to ensure thorough drying and decontamination.

Everyday Moisture Management

In everyday life, ensure that wet areas are dried promptly. For example, after showers, wipe down tiles, glass doors, and other surfaces to remove moisture. Avoid leaving wet clothes in the washing machine for extended periods, as this can create an environment conducive to mould growth. Hang wet clothes to dry in well-ventilated areas, preferably outside or in rooms with good air circulation.

Wet Floors and Carpets

If carpets get wet, use a wet-dry vacuum to remove as much water as possible. Follow up with fans and dehumidifiers to ensure thorough drying. For wet hard floors, mop up the water immediately and allow them to dry completely. If water has seeped under flooring, consider removing the flooring to ensure the subfloor is dry.


4. Ensure Proper Ventilation


Ventilation Systems

Proper ventilation is key to reducing indoor moisture levels and preventing mould growth. Ensure that your home has adequate ventilation in areas where moisture is commonly generated, such as kitchens, bathrooms, and laundry rooms. Good ventilation helps remove moisture-laden air from these areas, reducing the likelihood of mould formation.

Exhaust Fans

Install exhaust fans in bathrooms and kitchens. Use them while cooking, showering, or using the dishwasher to expel moisture-laden air outside. Ensure that exhaust fans are vented to the outside, not into the attic or crawl space, as this can cause moisture to accumulate in these areas.

Vent Appliances Outside

Ensure that appliances like clothes dryers and stoves vent to the outside and not into the attic or crawl space. Improper venting can lead to moisture accumulation within the home, creating conditions conducive to mould growth. Regularly check and clean vent ducts to ensure they are free of obstructions.

Air Circulation

Use air conditioning units and dehumidifiers to control humidity, especially in humid climates. Regularly clean these units to prevent them from becoming moisture sources themselves. Ensure that air conditioning units are properly maintained and that the condensate drain line is clear to prevent water build-up.

Energy-Efficient Homes

In energy-efficient homes, moisture can be trapped inside due to improved insulation and airtight construction. Open windows when weather permits to allow fresh air circulation and reduce humidity levels. Mould removal process is strenuous running an exhaust fan or using a dehumidifier can also help maintain appropriate humidity levels,


5. Monitor Indoor Humidity


Humidity Levels

The EPA recommends keeping indoor humidity levels between 30% and 60%. High humidity provides an ideal environment for mould growth. Maintaining humidity within this range can significantly reduce the risk of mould.

Moisture Meters

Purchase a moisture meter from a hardware store to monitor humidity levels in your home. These devices provide accurate readings and help you maintain optimal humidity levels. They are particularly useful in areas prone to high humidity, such as basements and bathrooms.

Condensation Indicators

Be aware of signs of high humidity, such as condensation on windows, pipes, and walls. If you notice these signs, take immediate action to reduce humidity by using a dehumidifier or increasing ventilation. Wipe away condensation promptly and address the source of moisture to prevent mould growth.

Humidifiers

If you use a humidifier, monitor its use to prevent over-humidifying your home. Ensure it is set to maintain humidity levels within the recommended range. Regularly clean and maintain your humidifier to prevent it from becoming a source of mould spores.


6. Direct Water Away from Your Home


Proper Grading

Ensure the ground around your home is properly graded to direct water away from the foundation. Poor grading can lead to water pooling around the foundation, which can seep into basements and crawl spaces, creating a conducive environment for mould growth.

Downspout Extensions

Install downspout extensions to carry water at least 5 to 10 feet away from the foundation. This prevents water from accumulating near the house and reduces the risk of basement flooding. Regularly check that downspouts are not clogged and are properly directing water away from the home.

Drainage Systems

Consider installing a drainage system around your home, such as French drains, to direct water away from the foundation. These systems can be particularly beneficial in areas with high rainfall or poor soil drainage. Proper drainage helps prevent water from accumulating near the foundation and seeping into the basement or crawl space.

Waterproofing

Apply waterproofing coatings to basement walls and floors. These coatings create a barrier that prevents water from seeping into the basement, reducing the risk of mould growth. Regularly inspect the waterproofing to ensure it remains effective and reapply as necessary.


7. Maintain and Repair Roof Gutters


Regular Cleaning

Clean your roof gutters regularly to remove leaves, debris, and other blockages that can cause water overflow. Clogged gutters can lead to water seeping into the roof and walls, promoting mould growth. Make gutter cleaning a routine part of your home maintenance schedule.

Inspections and Repairs

Inspect your gutters for damage or signs of wear and tear. Repair or replace damaged sections promptly to ensure they function correctly. Look for leaks, rust, and other signs of deterioration that could compromise the gutter system.

Gutter Guards

Install gutter guards to prevent leaves and debris from entering the gutters. These guards can reduce the frequency of gutter cleaning and help maintain proper water flow. They are especially useful in areas with many trees or during the fall when leaves are abundant.

Downspout Maintenance

Ensure that downspouts are clear and free of obstructions. Regularly check for and remove any debris that could block water flow. Properly functioning downspouts are crucial for directing water away from the house’s foundation.


8. Improve Air Flow in Your Home


Open Doors and Windows

Enhance air circulation by opening doors and windows whenever possible. Fresh air can help reduce indoor moisture levels and prevent mould growth. Take advantage of cool, dry days to ventilate your home thoroughly.

Move Furniture

Avoid placing furniture directly against walls, as this can restrict air flow and trap moisture. Leave a small gap between furniture and walls to allow air to circulate. This practice helps prevent the formation of condensation and mould behind furniture.

Closet Ventilation

Keep closet doors open occasionally to allow air circulation. Closets can trap moisture and become breeding grounds for mould if not ventilated properly. Installing louvered doors or adding ventilation grilles can also help improve air flow in closets.

Use Fans

Use ceiling fans and portable fans to improve air circulation in your home. Fans help distribute air evenly and reduce moisture build-up. Place fans strategically in areas prone to moisture, such as bathrooms, kitchens, and basements.


9. Keep Mould Off Household Plants


Moist Soil Management

Household plants can contribute to indoor humidity and provide a breeding ground for mould in the soil. Avoid overwatering plants and ensure they are not sitting in standing water. Use pots with drainage holes to prevent excess moisture from accumulating in the soil.

Natural Antifungal Solutions

Add a bit of Taheebo tea to the water you give to your houseplants. The oil of this tree, which withstands fungi even in rain forests, helps hinder mould growth in plant soil and can be found at natural food stores. This natural mould removal solution can help keep the soil healthy and free from moulds.

Proper Drainage

Ensure that plant pots have proper drainage to prevent water from accumulating in the soil. Excess moisture can lead to mould growth not only in the soil but also on the plant itself. Use well-draining soil mixes and avoid using pot saucers that can hold water.

Air Circulation for Plants

Place plants in well-ventilated areas to promote air flow around them. Good air circulation helps prevent the build-up of moisture and reduces the risk of mould. Avoid clustering plants too closely together, as this can restrict air flow and create humid microenvironments.


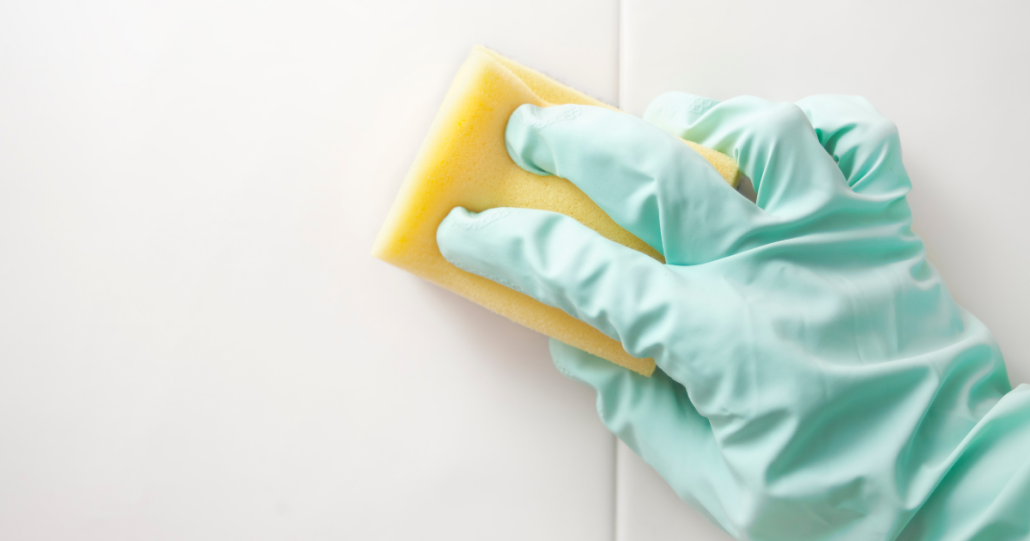
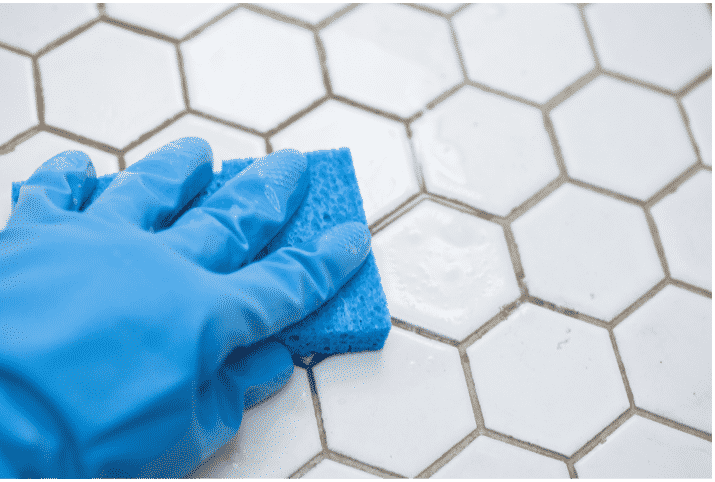
10. Regularly Clean and Disinfect Your Home


Cleaning Routine

Establish a regular cleaning routine to keep your home free from mould spores. Focus on areas prone to moisture, such as bathrooms, kitchens, and basements. Regular cleaning prevents mould spores from settling and growing.

Mould Removal Products

Use mould removal cleaning products, especially in high-moisture areas. Bleach solutions, vinegar, and commercial mould removers can effectively eliminate mould spores. Follow the instructions on the product labels for safe and effective use.

Deep Cleaning

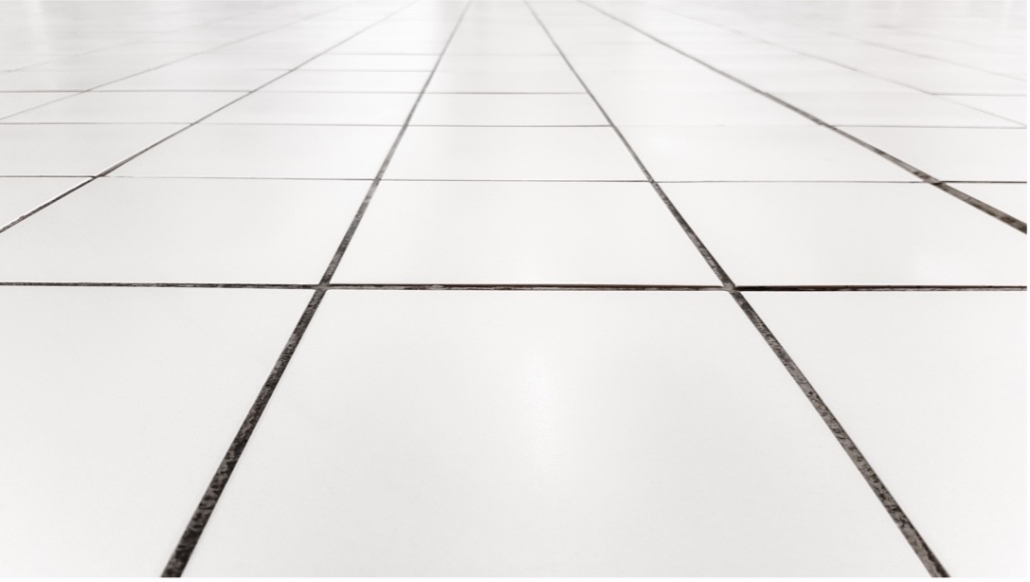
Periodically perform deep cleaning in areas where mould is likely to grow, such as behind appliances, under sinks, and around showers and bathtubs. Pay attention to grout lines, caulk, and other crevices where mould can hide. Use a toothbrush or small scrub brush to clean hard-to-reach areas.

Inspect and Replace

Regularly inspect caulking and grout in bathrooms and kitchens. Replace any damaged or deteriorating materials to maintain a watertight seal and prevent moisture intrusion. Reapply caulk and sealant as needed to ensure a strong barrier against moisture.


By implementing these ten comprehensive tips, you can significantly reduce the risk of mould in your home. Maintaining a mould-resistant environment not only protects your health but also preserves the structural integrity of your home. Consistent attention to moisture control, ventilation, and cleanliness will help keep mould at bay, ensuring a safe and comfortable living space.

DIY Tile and Grout Cleaning vs. Professional Solutions

Keeping your tiles and grout looking great can be a real challenge, and it’s often a task that homeowner’s dread when it comes time for a deep clean. At South QLD Restoration, we often get asked about the differences between DIY tile and grout cleaning and our professional tile and grout cleaning services in Brisbane. Let’s explore why professional solutions are typically the superior choice.

The Drawbacks of DIY Tile and Grout Cleaning

  • Money Matters

At first glance, DIY cleaning might seem like a cost-effective option. However, the expenses can quickly add up! Purchasing specialised cleaning solutions, brushes and other tools can be costly. Plus, if you don’t get the results you want, you may end up buying more products or, worse, damaging your tiles, leading to costly repairs or replacements.

  • Time-Consuming Efforts

Cleaning tile and grout is not a quick task. It involves scrubbing each grout line meticulously and applying multiple treatments. For busy homeowners, this can mean sacrificing valuable time that could be spent with family or on other important activities. Professional cleaners can do the job more efficiently and save you hours, if not days, of hard work.

  • Less Than Perfect Results

No matter how hard you scrub, DIY methods often fail to achieve the deep clean that professional equipment can provide. Household cleaners and brushes can only do so much. Professional tile and grout cleaning services use advanced machinery and high-quality cleaning agents that penetrate deep into the grout, removing dirt, stains, and bacteria that DIY methods leave behind.

  • Potential Side Effects

Using the wrong cleaning products can have adverse effects on your tiles and health. Many store-bought cleaners contain harsh chemicals that can erode the grout, damage the tiles, and emit toxic fumes. These fumes can cause respiratory issues, skin irritation and other health problems, especially if used in poorly ventilated areas. Professional cleaners, on the other hand, use safe, eco-friendly products that are tough on dirt but gentle on your home and health.

Why Professional Tile and Grout Cleaning Matters

Professional tile and grout cleaning is key to keeping your floors looking great and lasting longer. In areas like bathrooms and laundry rooms, it helps prevent mould and mildew, which can cause serious health concerns. Professional services can also bring back the original shine and colour of your tiles, making your home look fresh and bright. Investing in professional cleaning not only preserves your tiles but also creates a healthier living environment for your family with long-lasting results.

While DIY tile and grout cleaning might seem tempting, the drawbacks often outweigh the benefits. For a truly effective and hassle-free clean, professional solutions are the way to go. At South QLD Restoration, we offer expert tile and grout cleaning services in Brisbane that save you time, money, and effort while delivering superior results.

Contact us today to schedule a professional cleaning service that will transform your home.

Professional Tile Cleaning Tips You Need to Know for Beautiful Tiles

People love to choose tiles for their home because they’re durable, long-lasting, and extremely resistant to stains. Aside from durability, people choose tiles over other floorings because the tile cleaning process is less effort in comparison to other floors such as carpet. Taking care of tiles with regular tile cleaning doesn’t require as much time and energy and is a simple way to keep your home looking fresh. To help your tiles look brand new, we’re sharing our professional tile cleaning tips that you need to know.


Understanding Your Tiles

Tiles come in a variety of materials and no tile cleaner is universal for all types of tiles. Different tiles also require different cleaning techniques and types of cleaning tools as well. Before getting into our tile cleaning tips, it’s important to understand the tiles you have in your home. Some of the most common tiles found in homes are:

Ceramic Tiles

Ceramic tiles are common in homes as they’re extremely durable which makes them ideal for a range of rooms within the home. In comparison to other tiles available on the market, aside from their longevity, ceramic tiles are available at a lower price point helping you stick to renovation budgets easily. They also have a simple installation process and are easy to clean which draws a lot of homeowners’ attention. Ceramic tiles come in glazed and unglazed finishes, it’s important to understand the difference between the two as this can change your tile cleaning process.

Porcelain Tiles

Like ceramic tiles, porcelain tiles are also another popular tile choice for homes. People tend to choose porcelain tiles over ceramic because of the materials ability to replicate popular materials such as natural stone, brick, or wood. This makes them the perfect choice for those on a budget or who don’t want to commit to the upkeep or weathering that usually affects other materials. Porcelain is also able to be used outdoors because of how durable it is and isn’t susceptible to cracking fading.

Stone Tiles

There’s a wide variety of stone tiles that can be chosen for your home. Some of the most popular include:

  • Travertine
  • Marble
  • Slate
  • Onyx
  • Quartzsite

Stone tiles are a popular feature among homes and although they can be used as normal flooring many homeowners love to use them as splashbacks or feature them in bathrooms.

Professional Tips for Tile Cleaning


Not all tiles should be cleaned the same way, so we’ve simplified the process by having two different tile cleaning processes, one for porcelain and ceramic tiles and another for stone tiles.

Ceramic and Porcelain Tile Cleaning

Due to their durability, these tiles are frequently featured in high-traffic areas of the home but by following our tile cleaning steps they’ll be sparkling in no time!

Step 1: Loosen surface dirt and debris by sweeping or vacuuming over the tiles. Doing this regularly is a quick and simple process that can prevent your tiles from becoming dull.

Step 2: Determine the right floor mop for your tiles. All that you need to clean your tiles is a mild detergent and clean water but it’s important to use a rag or chamois type mop for your floor instead of a sponge mop. This is because the sponge mops tend to push dirty water into grout lines that can affect your grout and make it more difficult to clean. Another tip is when cleaning your floor, change the water regularly because this helps prevent your tiles from looking cloudy.  

Step 3: Here it’s important to look out for any stains on your tiles and be careful of soap residue. If you do find a stain on the tiles, it’s important to try and figure out what type of substance has caused the discolouration and then reach out to a professional. Although you can find store-bought tile cleaners if used incorrectly or you’ve bought the wrong one for the type of stain this can negatively impact your tiles.

If there are no stains but once finished your tiles still look hazy, it’s most likely caused by soap residue. This can be removed by using a nonabrasive all-purpose cleaner over the top of the tiles.

Step 4: If your tiles are glazed it’s important to dry them with a clean cloth so water stains don’t form, forcing you to have to complete the entire process again.

Stone Tile Cleaning

When it comes to cleaning stone tiles there’s no universal way to clean them as each type of stone requires a different cleaning method. Although we can’t give you an exact step-by-step breakdown of cleaning stone tiles, we can help you learn what products to use for cleaning some of the most popular stone tiles.

Travertine

When cleaning travertine you shouldn’t use soap on because it can leave streaky residue on the tiles, particularly if you have polished travertine in your home. The ideal way to clean travertine would be using mild, phosphate-free, liquid dishwashing soaps or powders. It’s important to avoid bleach, acid-based or abrasive products to prevent your tiles from becoming damaged.

Marble

Marble is a beautiful tile featured in homes, but it’s also high maintenance compared to other tiles. You must steer clear of anything that has an acidic PH level when cleaning marble tiles. Even natural cleaners like lemon or vinegar need to be avoided as they can wear down the surface of the tile causing damage. Using harsh brushes or scouring powders should also be put away when cleaning marble to prevent scratching the surface of the tiles.

Slate

Mild detergents can be used when cleaning slate tiles if they don’t contain any acidic properties, for example, lemon or vinegar. Some slate tiles can have a topcoat on them which in this case they need to be dried with a gentle cloth to avoid water stains.  

Need Help with Your Tile Cleaning?

Although tile cleaning is simple, occasionally your tiles do need to be cleaned professionally to help restore their original sparkle. When this is the case, contact our team here at South QLD Restoration for our tile and grout cleaning service. Our experts will have your tiles looking as if they were just laid! Find out more about this service here.

4 Techniques to Simplify Grout Cleaning

Tiles and grout are generally located in some of the most high-traffic areas of a home, making them both susceptible to immense amounts of dirt. Although tiles are a popular choice within the home due to the ease of cleaning, sometimes the biggest difference between sparkling tiles and dirty ones is the grout in between. Grout can quickly become dirty as it is a very porous material, acting similarly to a sponge and soaking up any spills, grease, grime, or oils it is exposed to.

Regular grout cleaning can help combat these stains and have your flooring looking as if it were freshly laid. To help you get on top of your grout cleaning, we thought we’d share a few fail-proof strategies to help you have your floors shining again in no time!

What is Grout?

Grout is a form of dense fluid used to fill gaps like those between tiles, or it can be used to reinforce existing structures. Most grouts are generally made up of a mixture of water, cement, sand, and colourant. The colour of the grout is completely customisable to ensure it matches the tiles chosen for your home. Grout helps protect tiles by filling in the gaps as this prevents tiles from being exposed to dirt and grease that may become trapped underneath them. By preventing anything from getting underneath the tiles helps strengthen the tiles to complete the installation and prolong their overall lifespan.

The Importance of Grout Cleaning

Grout cleaning needs to be completed on a regular basis because dirt and grime can build up easily and quickly in these specific areas. Without frequent grout cleaning, grout can begin to discolour making it seem way darker than its original colour and changing the entire appearance of your home. Poorly maintained grout doesn’t only look terrible in and around your home, but it can also cause negative health impacts on those who live there as bacteria can begin to grow on the grout.

When researching the best way to help clean your grout you’ll be faced with many different techniques but it’s imperative to be sure you know how to clean the grout correctly, so no damage is done. If you’re unsure of how to complete the grout cleaning without damaging your grout or tiles, it’s best to leave it to the professionals. Using the incorrect chemicals or too many rough abrasions from scrubbing can wreck your grout and leave you with a bigger mess than what you started with.

Grout Cleaning Techniques

  1. Plain Warm Water and a Stiff-Bristle Brush

When it comes to grout cleaning the safest option is always starting off with the weakest solution first because in any case the less chemicals you use the better. If you clean your grout regularly you may simply be able to use plain warm water and a stiff-bristle brush to help restore your grout. This technique is simple, you just have to spray or pour a small amount of warm water onto the grout and then scrub softly in circular motions to clean it then let it dry.

  1. Vinegar and Warm Water Solution

If plain water and soft scrubbing aren’t working, you can add equal parts vinegar and hot water for a slightly stronger solution. Vinegar is a cupboard staple in most houses so it shouldn’t be too difficult to get your hands on. Instead of spraying it on and scrubbing it immediately, these solutions need to be applied and then left to sit for about five minutes. After it has rested, you can then begin scrubbing the area in gentle, circular motions.

  1. Baking Soda Paste Sprayed with Vinegar

Are you still struggling to remove tough stains? Don’t worry, there’s still one more solution you can try that doesn’t require you to handle strong chemicals. The first step is to create a baking soda paste with water and then apply this paste to your grout. This step will be followed by spraying the paste with the vinegar solution we discussed in the previous step. This mixture will cause the solutions to begin foaming but once it stops it’s time to begin scrubbing the grout softly. Once you’ve finished scrubbing it’s important to rinse the grout off with plain water to remove any remnants of the mixture.

  1. Employ Professional Help

The easiest way to guarantee beautiful grout every time is by enlisting professional help. The most obvious issue you may encounter when attempting to clean grout yourself is that it is an extremely time-consuming process, no matter what area you are working with. Scrubbing entire areas, such as a shower or splashback, with a tiny brush, can take hours to complete, let alone scrubbing an entire tiles bathroom or kitchen.

In some cases, you may also get carried away with trying to scrub out stains and cause damage to the grout. If grout is worn away to due harsh scrubbing this can cause immense damage to your tiles as water can seep in underneath them. This can cause them to begin breaking or the subfloor or wall they are situated on to become compromised.

To simplify your entire grout cleaning process, reach out to our experts here at South QLD Restoration. We have the correct cleaning tools and access to effective cleaning solutions to have your grout looking brand new in no time, without any damage. Many people often assume professional grout cleaning services are off the cards due to cost but they’re actually more affordable than you’d assume.

With years of experience in grout cleaning combined with our heavy-duty equipment, we can guarantee we can have your tiles looking brand new. Contact our team today to arrange a quote.  

Tile & Grout Cleaning McDowall

Tile & Grout Cleaning McDowall .

Brisbane, McDowall

30

Square Metres

What we did in this location:


A successful tile and grout repair at our clients property in McDowall. Our client contacted us through the South QLD Restoration website requesting a quote for repairs to affected tiled area in the living area of his property. After an initial consultation with our restoration technician our client was satisfied in the recommendations given and accepted our quote proposal. Another happy client following another exceptional job done by our SQR technician.

Services


  • Tile & Grout Cleaning


Location


Brisbane

McDowall


MOULD REMOVAL SERVICES
TO BRISBANE, GOLD COAST AND SUNSHINE COAST

If you have mould in your home, you need to act quickly.
At least get some information from our advice line so you are aware of your mould removal options.

Pest Control Flagstone

Pest Control Flagstone .

Flagstone, Logan

30

Square Metres

What we did in this location:


As well as successfully completing a 3 bedroom carpet clean, South QLD Restoration were also contracted to complete an internal pest control for a property at Flagstone after hearing about us on Facebook. Another happy customer following another effective job done well. Our customer was very impressed with our speedy service and prompt and professional assisstance.

Services


  • Pest Control


Location


Flagstone

Logan


MOULD REMOVAL SERVICES
TO BRISBANE, GOLD COAST AND SUNSHINE COAST

If you have mould in your home, you need to act quickly.
At least get some information from our advice line so you are aware of your mould removal options.

Fire Remediation Hope Island

Fire Remediation Hope Island .

Gold Coast, Hope Island

30

Square Metres

What we did in this location:


Restoration job for fire damage caused by an electric candle which initially started in the laundry room, resultant damage to walls, ceilings, flooring, benchtop in laundry, shelving and cupboards affecting a number of 6 rooms. Air filtration devices were installed at the property whilst South QLD Restoration technicians undertook washing of affected ceiling and walls and removal of soot. All floors throughout the property was also scrubbed and washed clean. A Non Restorable content inventory was also completed by South QLD Restoration technicians.

Services


  • Fire Remediation


Location


Gold Coast

Hope Island


MOULD REMOVAL SERVICES
TO BRISBANE, GOLD COAST AND SUNSHINE COAST

If you have mould in your home, you need to act quickly.
At least get some information from our advice line so you are aware of your mould removal options.

Fire Make Safe Tenterfield

Fire Make Safe Tenterfield .

NSW, Tenterfield

30

Square Metres

What we did in this location:


South QLD Restoration were contacted to carry out an assessment, make safe and cleaning of a property that was damaged by a fire. Resultant damage to fencing, storage shed and kennels. An air scrubber was installed at the property to remove fire particulates from the air removing additional source materials for odors. South QLD Restorations technicians also cleaned and treated minor mould which was found on the walls as well as treating the affected areas with heavy duty fire restore solution. Flooring and content were steam cleaned and soiled clothing was sent to the dry cleaners for professional cleaning.

Services


  • Fire Make Safe


Location


NSW

Tenterfield


MOULD REMOVAL SERVICES
TO BRISBANE, GOLD COAST AND SUNSHINE COAST

If you have mould in your home, you need to act quickly.
At least get some information from our advice line so you are aware of your mould removal options.

Tile & Grout Cleaning, Surface Mould Cleaning Wakerley

Tile & Grout Cleaning, Surface Mould Cleaning Wakerley .

Brisbane, Wakerley

30

Square Metres

What we did in this location:


Customer contacted us through Google search, requesting for a quote on tile and grout cleaning, cleaning of glass for bathroom shower and resilicone to bathroom wet areas. Satisfied with pricing and successfully cleaning off a heavy build up of dirt and grime from the wet areas, the customer was very happy with the result and the professionalism given by South QLD Restorations technician.

Services


  • Tile & Grout Cleaning
  • Surface Mould Cleaning


Location


Brisbane

Wakerley


MOULD REMOVAL SERVICES
TO BRISBANE, GOLD COAST AND SUNSHINE COAST

If you have mould in your home, you need to act quickly.
At least get some information from our advice line so you are aware of your mould removal options.

Tile & Grout Cleaning Hawthorne

Tile & Grout Cleaning Hawthorne .

Brisbane, Hawthorne

30

Square Metres

What we did in this location:

Customer contacted us through our website after reading past reviews. Our customer was happy with the result of her tile and grout cleaning and commented on South QLD Restorations great service, pricing and communication that was given from initial contact through to our booking and payment process.

Services

  • Tile & Grout Cleaning

Location

Brisbane

Hawthorne

MOULD REMOVAL SERVICES
TO BRISBANE, GOLD COAST AND SUNSHINE COAST

If you have mould in your home, you need to act quickly.
At least get some information from our advice line so you are aware of your mould removal options.

Get a quote today!

    Your Mobile Number: