How Pressure Cleaning Can Revitalize Your Home Exterior

How Pressure Cleaning Can Revitalize Your Home Exterior

How Pressure Cleaning Works: High-pressure water is used for pressure cleaning, which is also called power washing, to get rid of dirt, dust, and other contaminants on surfaces. The deep cleaning power of this method goes beyond what regular hoses can do and works on a wide range of outdoor materials.

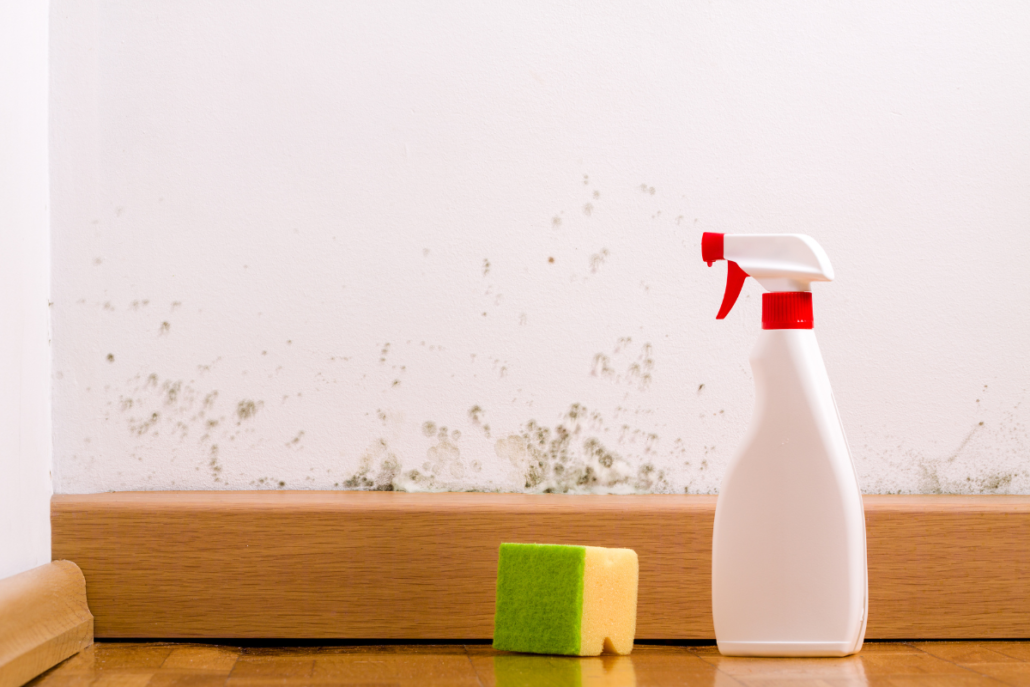
Getting rid of tough stains and mould: High-pressure water, which is used in pressure washing, is great at getting rid of tough stains that have built up over time. Pressure cleaning is also a great way to get rid of mould and mildew that grows on outside surfaces, making the area better to live in.

Getting the Vibrancy of Outside Surfaces Back: Surfaces that are outside can lose their colour when they are exposed to the weather, whether they are made of concrete, wood, or something else. Pressure cleaning can bring these surfaces back to their original colour and beauty, giving worn and discoloured areas a new lease on life.

Increasing the value and appeal of your home: A clean and well-kept exterior makes your home look much better from the street. This change in how the property looks can help it sell for more money, so pressure cleaning is a good investment for people who want to make a good impression.

Stopping Damage That Will Last: Regular pressure cleaning isn’t just for looks; it’s also a way to stop damage from happening in the long run. Building up dirt and grime on outside objects can cause them to deteriorate and break down. Cleaning your home with high-pressure water helps protect it from these harmful effects, which makes it last longer.

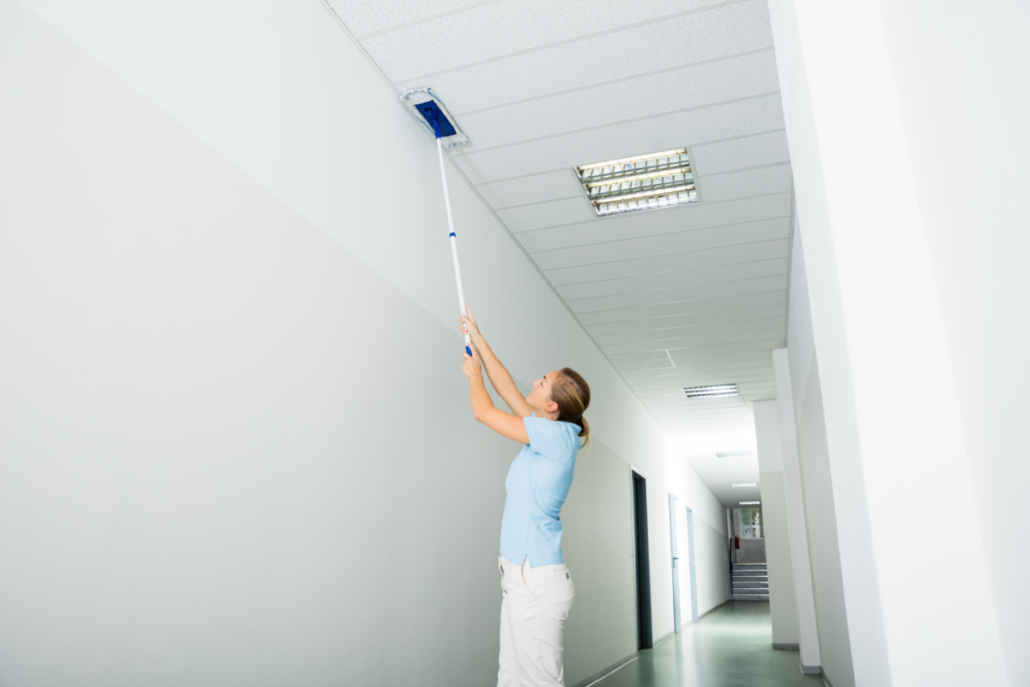
Clean Areas That Are Hard to Get to: One great thing about pressure cleaning is that it can get to places that are hard to get to otherwise. The high-pressure water can get rid of dirt and other debris from cracks, crevices, and high surfaces, so all outdoor areas are thoroughly cleaned.

Getting Surfaces Ready to Paint or Remodel: It’s important to start with a clean surface before you start painting or remodelling. Pressure cleaning is an important part of surface preparation because it gets rid of dirt and other impurities from the outside of surfaces, making them easier to paint or cover.

Eco-Friendly Way to Clean: Pressure cleaning is the best option for people who care about the environment. It cuts down on the need for strong chemicals, so it’s an eco-friendly way to keep the outside of your home clean. This is in line with environmentally friendly practises and helps make the place where people live better.

Keeping outside materials from getting damaged: Pressure cleaning is a strong method, but it’s important to use the right pressure levels and methods to keep different exterior materials from getting damaged. It is important to follow the safe pressure cleaning guidelines to get the best results without damaging the surfaces.

Pressure cleaning yourself vs. hiring a professional

There are pressure cleaning tools that you can use on your own, but it’s better to hire a professional. Professional cleaners have the knowledge, industrial-grade tools, and skills to get rid of specific problems, making the cleaning process more thorough and effective.

How often you clean with pressure: How often you should pressure clean the outside of your house depends on things like the weather, the surroundings, and how much dirt and grime you are exposed to. Usually, you should have your property pressure cleaned once a year or twice a year to keep it in perfect shape.

Long-Term Solution That Saves Money: Pressure cleaning may cost more at first, but it’s worth it in the long run because it gets the job done better and faster. Regular pressure cleaning helps external surfaces last longer, so they don’t have to be replaced as often, which saves money in the long run.

Essential Tile Maintenance Tips for Long-Lasting Beauty

Essential Tile Maintenance Tips for Long-Lasting Beauty


Performing regular cleaning tasks: The best way to keep dirt and grime from building up is to clean every day. Simple habits, like sweeping or cleaning, can keep your tiles shiny and protect them from wear. If you use the right cleaning tools for your tile, you can be sure that they will clean well without damaging it.

How to Take Care of and Keep Grout: Grout is very important for how long tiles last, but it’s often forgotten. Cleaning and finishing the grout on a regular basis keeps it from discolouring and getting damaged by water, which makes your tiles last longer. Paying a little attention to the grout can help your tiled surfaces look great for a long time.

Keeping away from harsh cleaners: Even though cleanliness is very important, the cleaners you use are important too. Over time, cleaners that are too rough or harsh can damage the surface of your tiles. Choose options that are gentler and will clean the tile well without damaging it.

How to Avoid Chips and Scratches: To keep your tiles from getting scratched or broken, you need to be careful. Be careful when moving big things and don’t drag things across tiled floors. Use furniture pads. Following these easy steps will keep your tiles smooth and free of ugly marks.

How to Remove Stains Right away: Getting rid of spots quickly is important to avoid damage in the long run. Different spots need different treatments, so it’s important to know how to handle them without hurting the tile. Taking quick action will keep your tiles clean and bright.

Regular Checks of the Tiles: Regular checks help keep problems from happening and find them early. You should check your tiles regularly to see if they are worn down, cracked, or otherwise damaged. If you find problems early, you can fix them quickly to keep your tiles looking beautiful.

Putting on sealant to protect: Sealant protects your floors from stains and water damage by creating a barrier. How often you need to add sealant depends on things like how often people walk on the tiles and what kind of tiles they are. Regular use guarantees long-lasting security.

How to Use Area Rugs and Mats Correctly: By putting floor rugs and mats in the right places, you can keep them from wearing out too quickly in high-traffic areas and keep water from building up. To keep your tiles in great shape and stop mould from growing, choose materials that let air flow through them.

Staying away from big changes in temperature: Extreme changes in temperature can damage tiles, causing them to crack and break. Do not let the temperature change quickly, and use rugs or blinds to keep the temperature from getting too high or too low. By taking these steps, you can keep your tiles from getting damaged.

How to Care for Different Types of Tile

Taking care of different types of tile is different. No matter if your tiles are made of ceramic, porcelain, or real stone, knowing what they need can help you take care of them in the best way. When it comes to taking care of tiles, one size does not fit all.

Professional Services for Cleaning Tiles: Regular care is important, but having a professional clean it every so often is also a good idea. Professionals have the skills and tools to give your tiles a good clean, get rid of tough stains, and make them look brand new again.

How to Stop Mould and Mildew From Growing: Mould and mildew grow best in damp places, which means they can damage both the look and health of your tiles. Minimise wetness by making sure there is enough air flow, especially in bathrooms and kitchens, to stop these unwanted guests from growing.

How to Fix Tiles Yourself: There are easy things you can do yourself to bring back the shine of tiles that have small scratches or become dull. You can give your tiles a new look without hiring a professional by using baking soda or toothpaste or other cheap and easy methods.

How Steam Carpet Cleaning Can Transform Your Floors

How Steam Carpet Cleaning Can Transform Your Floors

How to Clean Your Carpet with Steam: The power of hot water vapour is used in steam carpet cleaning to get rugs really clean. Instead of using chemicals and cleansers like other methods, steam cleaning uses the natural cleaning power of steam to get rid of dirt and stains. This makes it a good choice that is also good for the environment.

Getting rid of deep-rooted dirt and stains effectively: When you clean your carpet, high-temperature steam goes deep into the fibres and loosens and lifts dirt that has been stuck there for a long time. Stains that won’t come out with regular cleaning methods are taken care of successfully, leaving the carpet noticeably cleaner and fresher.

Cleaning and germ-killing carpets: Steam can kill bacteria, germs, and allergens that are in rugs, in addition to cleaning the surface. This makes the air inside healthy, which is especially important for homes with pets or people who have allergies. The carpet will also look cleaner.

How to Keep Carpet Fibres and Colours Fresh: The gentle nature of steam cleaning makes sure that the carpet fibres are cleaned well without harm. These cleaning methods don’t add to wear and tear on the carpet, so colours stay bright and the carpet lasts longer.

Getting Rid of Bad Smells: Steam cleaning doesn’t just cover up smells; it gets rid of them where they come from. Whether you have pet smells, smoke smells, or other smells that won’t go away, steam cleaning can get rid of them all and leave your carpets smelling great.

Getting rid of allergens and making indoor air better: One big benefit of steam cleaning is that it gets rid of allergens like dust mites and pet hair. Because it gets rid of these tiny bits, steam cleaning is great for both homes and businesses because it improves the quality of the air inside.

Fast drying time and little residue: One of the benefits of steam cleaning is that it cuts down on the time it takes to dry. Traditional methods can leave rugs wet for a long time. Steam cleaning, on the other hand, makes sure that they dry quickly, which lowers the chance of mould or mildew growth. It also doesn’t leave behind much of a film, so it doesn’t feel sticky like some other cleaning methods do.

Cleaning option that is good for the environment: Steam cleaning is the best option for people who care about the environment. It gets rid of the need for harsh chemicals, which makes carpet cleaning cleaner and more environmentally friendly. This keeps the place safe for both the environment and the people who live there.

Ability to clean different types of carpets: Whether your rugs are made of natural fibres or man-made fibres, steam cleaning can work on both. Different types of carpet can be cleaned with this method, which makes sure that the best results are achieved without damaging the carpet.

Professional Steam Cleaning vs. Do It Yourself

Some people may choose to use steam cleaners on their own, but professional services have more benefits. Professionals are a great choice for thorough and effective carpet cleaning because they have the knowledge, industrial-grade tools, and skills to handle specific problems.

How Often to Clean Your Carpet with Steam: How often you should steam clean your carpets depends on things like how often people walk on them, whether you have pets, and your worries about indoor air quality. Residential carpets usually need to be steam cleaned every 6 to 12 months, but places that get a lot of foot traffic may need to be cleaned more often.

Long-Term Solution That Saves Money: Professional steam cleaning may seem more expensive at first than doing it yourself, but the long-term benefits are worth it. Regular steam cleaning helps rugs last longer, so you don’t have to buy new ones as often, which saves you money in the long run.

Key Steps for Long-term Pest Prevention

Getting to Know the Pest Threat

From rats to insects, pests come in many shapes and sizes and each one causes its own problems. Understanding the unique threats they pose is important for coming up with a good plan to stop them. A proactive approach to pest control doesn’t just deal with pests that you can see; it also plans for and stops possible infestations before they happen.

Evaluation of the Current Pest Situation

It’s important to figure out how bad the pest problem is before taking any preventative steps. Do a full check of the property to find any pest problems that are already there. This first step sets a standard for how bad the problem is and guides the next steps that will be taken to stop it.

Putting in place good waste management

Poor trash management is an often-overlooked reason why pests come to a place. Pests are drawn to the smell of food, and a garbage disposal that isn’t being taken care of properly can be an open welcome. Getting rid of trash in the right way is an easy but effective way to keep pests away.

Blocking off entry points

Rats and mice get into places through cracks and gaps. Finding these entry places and sealing them off is one of the most important things you can do to keep pests out for good. Regular checks should be done on the structure to find and fix any problems.

Making sure the environment stays clean

Pests will stay away from places that are clean. Regular cleaning, like sanitising and getting rid of waste, gets rid of places where pests could hide and food sources for them. That’s a simple but very effective way to keep your home free of pests.

How to Pick the Best Pest Control Items

It’s not true that all pest control solutions are the same. Choosing safe and eco-friendly goods is very important for long-term success. In order to make smart decisions, you need to know what your place needs and what pests you’re dealing with.

Regularly checking for and reporting pests

Setting up a regular time to check for pests is important for finding them early and keeping them away. Regular checks for signs of pest activity, like damage or droppings, let you move quickly. A proactive reaction is guaranteed if any findings are reported right away.

Ways to use landscaping to keep pests away

Landscape design isn’t just about how it looks; it can also help keep pests away. Strategic gardening choices, like using plants that naturally keep pests away, help make the area less inviting for people who don’t belong there.

Educating residents or employees is a strong way to keep pests away. Teaching people about how to get rid of pests in their homes or businesses raises awareness and pushes them to be proactive. Taking simple steps to stop infections, like storing food properly, can go a long way.

Putting Integrated Pest Management (IPM) into action

For complete pest control, Integrated Pest Management (IPM) is a whole-person technique that combines different methods. This includes biological, physical, and cultural ways that lower the need for chemical solutions and encourage long-term, sustainable prevention.

Thoughts on Hiring Professional Pest Control

Many of the steps you can take to keep pests away can be done on your own, but there are times when you need professional pest control. To effectively get rid of pests, you need to know when to get professional help and what benefits they offer.

Changing plans based on how the seasons change

The way pests act can change with the seasons. Adapting your protection plans to these changes will make sure they work all year. For instance, some pests may be more active during the warmer months, so you may need to take extra care during those times.

Getting the community involved in preventing pests

Getting rid of pests is not just the job of property owners or managers. Getting people to feel responsible for their community helps them work together to keep the area free of pests. Promoting open conversation and group projects is helpful for long-term success.

Quick and Efficient Emergency Water Damage Cleanup Tips

Fast and Easy Ways to Clean Up Water Damage in an Emergency

Are you trying to get rid of the effects of water damage quickly? Here are some important things you should know to quickly clean up water damage after an accident.

Figure out how bad the damage is.

Take a look at the situation before you act. Find out where the water is coming from and decide if it’s from a burst pipe, floods, or something else. Figuring out how to clean up effectively requires knowing how bad the damage is.

First, make sure safety

Safety is the most important thing. In areas that have been damaged, turn off the power, especially if water has reached the outlets. To keep from getting sick or hurt, make sure you wear the right safety gear, like gloves and boots.

Quick Removal of Water

Getting rid of the water quickly is the key to stopping more damage. Getting rid of standing water can be done with a wet vacuum, a pump, or bags. If you get rid of the water quickly, there is less chance that it will damage the building or cause mould to grow.

Dry the affected areas completely.

After getting rid of the extra water, dry the item completely. To speed up the drying process, open windows, use fans, and think about getting a dryer. The goal is to get rid of all the water so that mould and mildew can’t grow.

Get damaged items back and get rid of them

Find things that can be fixed up and save them. Throw away things that can’t be fixed in a responsible way. This not only helps clean up, but it also lowers the health risks that come with using contaminated things.

Clean and germ-kill

Clean the damaged areas with the right chemicals to keep them germ-free. All surfaces, like walls and floors, should be disinfected to get rid of germs and stop health risks.

Look for Damage That’s Not Visible

It’s not always easy to see water damage. Check for damage in places that can’t be seen, like behind walls or under floors. Take care of secret problems right away to avoid problems in the future.

Fix and seal

After the area is clean and dry, you should close it and fix any damage to the structure. This step is very important for keeping your property’s structure and stopping water from getting in again.

Check for the growth of mould

Even after a full clean-up, keep an eye on the areas that were damaged for any signs of mould growth. Early discovery lets help arrive quickly, stopping major damage and possible health problems.

Quick and Easy Black Mould Removal Techniques

How Important It Is to Act Quickly

Time is of the key in the fight against black mould. Your most powerful tool is quick action.

How to Get Rid of Black Mould Yourself

How Vinegar Can Help You

Use vinegar’s natural strength to get rid of black mould successfully. One that saves money and is good for the environment.

Blitz Baking Soda

Baking soda can help you get rid of black mould in a way that is safe for your family and the environment.

Tea Tree Oil Wins

Learn about the antifungal properties of tea tree oil, a natural solution that gets rid of black mould and leaves behind a pleasant smell.

When Doing It Yourself Isn’t Enough: Hiring Professionals

In some situations, a professional may need to step in and help. Find out when you should call in professionals to get rid of black mould for good.

Ways to Keep Mould From Growing in the Future

After the mould has been removed, take these steps to protect your home from getting mould again.

Get rid of black mould with these tried-and-true methods. If you act quickly, whether you do it yourself or hire someone to help, you’ll have a mold-free home for years to come. Remember that acting quickly is the key to a mold-free home that is not only beautiful but also healthy.

Green Tile Cleaning: Eco-Friendly Options for a Sustainable Home

Keeping your home clean is essential, but it’s equally important to do so in an eco-friendly way. Many cleaning products contain harsh chemicals that can be harmful to both the environment and your health. When it comes to tile cleaning, plenty of green options are available that are just as effective as traditional cleaners. 

To ensure that your home’s tile cleaning process is eco-friendly and healthy for the family, here are some tips: 

Use Natural Ingredients

One of the easiest ways to clean your tiles without harming the environment is by using natural ingredients. Vinegar is an excellent choice for removing stains and dirt from tiles. Simply mix equal parts water and vinegar in a spray bottle and apply them to the tiles. Let it sit for a few minutes, then wipe it away with a damp cloth. Baking soda is another great option. Mix it with water to create a paste and apply it to the tiles. Let it sit for a few minutes, then scrub with a brush and rinse with water.

Avoid Harsh Chemicals

Traditional tile cleaners contain harsh chemicals that can be dangerous if not used properly. Many of these chemicals are toxic and can harm the environment if they end up in the soil or water supply. When purchasing tile cleaner, look for products that are eco-friendly and free of harsh chemicals. You can also make your own cleaner using natural ingredients like vinegar and baking soda.

Opt for Steam Cleaning

Steam cleaning is a great option for those who want a deep clean without using chemicals. The high temperature of the steam kills bacteria and removes dirt and grime from the tiles. Steam cleaners are also great for removing mould and mildew. They work by heating up water and releasing steam through a nozzle. The steam is then used to clean the tiles. If you decide to use a steam cleaner, make sure to follow the manufacturer’s instructions for safe and effective use.

Use Microfiber Cloths

Microfiber cloths are a great eco-friendly option for cleaning tiles. They are reusable and can be washed in the washing machine. Microfiber cloths are also effective at removing dirt and grime from tiles without the need for harsh chemicals. Simply wet the cloth with water and use it to wipe down the tiles.

Recycle Packaging

When purchasing tile cleaner, look for products that use recyclable packaging. Many eco-friendly cleaners come in packaging made from recycled materials. When you’re finished using the cleaner, make sure to recycle the packaging.

Cleaning your tiles in an eco-friendly way is not only good for the environment, but it’s also good for your health. By using natural ingredients, avoiding harsh chemicals, opting for steam cleaning, using microfiber cloths, and recycling packaging, you can keep your home clean and sustainable. Make sure to do your research and choose products that are safe for both you and the planet. By making small changes in the way you clean, you can make a big impact on the environment.

What to Expect After A Professional Pest Control Procedure? 

Professional pest control services are typically tailored to the specific needs of a home or business and can save time, money, and hassle by using effective, targeted treatments. Professional pest control is beneficial for many reasons. It can help prevent infestations, reduce the spread of diseases, and make a space safer and more comfortable for residents and guests. These experts can also identify and eliminate environmental factors that can attract pests, such as standing water, organic debris, and other sources of food or shelter. Professional pest control is important to maintaining a healthy, pest-free environment. 

Professional Pest Control Procedure Explained 

Pest control typically involves identifying the source of the pest infestation, eliminating the pest’s access to food, water, and shelter, and using a combination of physical, chemical, and biological controls to eliminate the pest population. Physical controls include traps, baits, and exclusion methods such as screens, caulking, and netting. Chemical controls include insecticides, repellents, and other pesticides. Biological controls can include using parasites, predators, or diseases to target the pest species. The pest control procedure should also include regular monitoring and follow-up visits.

Professional Pest Control | Big red gold coast

What to Expect After A Professional Pest Control Procedure?

After a professional pest control procedure, you can expect to see a reduction in pest activity. Depending on the type of procedure used, it may take several weeks for the full effect to be seen. In addition, you should also expect to receive advice from the pest control company on how to further prevent a future infestation. This may include removing potential food sources, sealing entry points, and implementing other preventative measures. 

Disinfecting Process After Pest Control Procedure

1. Thoroughly vacuum the area to remove any remaining pests and their eggs.

2. Apply an EPA-approved disinfectant to all surfaces, paying special attention to cracks and crevices.

3. Allow the disinfectant to dry before reintroducing furniture and other items back into the area.

4. Clean and sanitise all items removed from the area before the pest control procedure.

5. Wash bedding and other fabrics in hot water and detergent.

6. Keep the area clean and debris-free to prevent pests from returning.

South Qld Restoration specialises in professional pest control services. If your home or commercial facility requires pest control procedure, we can help you clean up the space!

The Aftermath of Water Damage: Mould Clean Up

When you encounter excess water on your property, it is a major cause for concern. Excess water will soak the materials throughout the area, and the longer the water remains present, the more damage it will cause to your home or business. Keeping in mind the torrential rain in parts of Northern NSW and Queensland, we are now being exposed to a new threat: severe mould exposure. Even if you have not been exposed to this threat yet, water damage can develop at any time for a variety of reasons. It can occur because of something as simple as a washing machine hose leak or a broken pipe. For less obvious reasons, a clogged gutter can overflow and cause water to burst into your home.

How Does Water Damage Your Property?

water damage mould cleanup

Leaking appliances, overflowing sinks or toilets, plumbing and sewage problems or heavy rains and floods can compromise the structural integrity of your property. This can lead to many unwanted and undesired consequences. When excess water begins to collect in areas where it shouldn’t it’s best to try and remove it followed by drying the area right away. The longer it sits there the longer it will lead to damaging your property and subsequently mould.

Mould are organisms that thrive in damp areas – or anywhere with excess moisture. They are an important part of the ecosystem, breaking down organic matter and helping to enrich the soil plants grow in. However, if this mould starts to grow in your home or property it can lead to serious damage. In a recent study, an estimate suggests that there are at least 100,000 species of mould present in and around us in our homes. While not all of them are toxic or dangerous, some species release mycotoxins which are harmful to the human body.  If you or someone you know has mould sensitivity, you may encounter symptoms such as-

  • respiratory congestion
  • coughing
  • sneezing
  • eye irritation
  • skin rashes
  • headaches

How to Prevent Mould After Water Damage

Mould after water damage begins to form as mildew in colonies that appears on wood, ceiling tiles, pieces of cardboard, wallpaper fabric, carpeting, pieces of drywall and even insulation. It can develop just about anywhere in your home where excess moisture is present for an extended period.

Drying and cleaning/disinfecting is a great start to prevent mould growth however some flooding can become so extensive and damaging that you may just need a team of pros to come in and handle the rest of the situation for you. This process is known as mould retention. Mould retention teams often spray down entire rooms. Even if your damage might be limited to a smaller section, this additional spraying makes it even less likely that mildew and mould have any opportunity to grow in your space. 

By now, you already know that mould is a very dangerous substance that can result in significant human health problems and certain people are at an even higher risk due to exposure. That said, mould is not only harmful to your home/property but also can have severe effects on your health.

Mould Prevention and Control Tips

mould removal
  • The tricky thing about mould is that you can clean mould and dry out areas, but water can travel quickly throughout surfaces, underneath tiles and carpets. The moisture may not be entirely gone, allowing it to resurface and provide the perfect environment for mould to grow.
  • If your belongings are wet and can’t be cleaned or completely dried, remove and replace them with new ones.
  • Use fans to circulate air into the space and speed evaporation unless mould has started to grow. The use of dehumidifiers is essential too as they can help reduce moisture and help things dry more quickly, especially in closed areas.
  • Scrub mould off hard surfaces with detergent and water and dry off completely
  • Consider investing in smart bathrooms. As places that are often or always damp can be hard to maintain and keep completely free of mould. There are heaps of new wall switches that have dual controls for turning off lights and fans after a preset time.
  • Use of wet/dry vacuums. Most renters/homeowners do not have one of these lying around. But if you are lucky enough to have quick access to a wet/dry vacuum, they can be an immense help after flooding or water damage.
  • Apply the “clean and dry” approach. Once an area or surface is clean, go ahead and disinfect it with a 10% bleach solution. Allow the bleach solution to remain in the place for at least 10 minutes and then rinse it off with plain, clear water and allow it to dry.
  • Learn to act quickly to prevent mould. A simple plumbing leak can dump several gallons per minute into your home. Simply shutting off the main water valve is not the solution as there may still be a few gallons of water held in the pipes. Turning on the lowest faucet in the house will let the water harmlessly drain out of the faucet instead of it leaking through the pipes.
  • When attempting to remove small patches of mould, be sure to wear personal protective equipment such as gloves, gumboots, and a mask.
mould removal prevention

If you believe you have areas of your home or property that could be prone to mould, contact our mould removal team. On your first call, we will be able to give an indication of how serious your mould problem could be, depending on the information you provide.

Flooding and mould are no joke. When this happens, call our Brisbane team to get options for mould removal.

How To Remove Mould from Your Ceiling

Have you noticed mould beginning to appear on the ceiling of your home? If you catch it early, it can be an easy fix. Removing mould from your ceiling is fairly similar to removing it from other areas of your house. You’ll use the same solution with a slightly different technique and of course, you’ll need to be extremely careful when on a ladder! Before beginning the removal, process there is a few important steps to follow, keep reading to learn what they are to ensure you’re removing mould from your ceiling effectively.

Do I Have to Remove the Mould from my Ceiling?

how to remove mould from ceiling

The short answer is YES! Mould can have detrimental impacts on not only the structural integrity of your home but also the health of those living there. Mould is a quick-growing fungus that spreads through airborne spores. Once it begins growing in one area, it can begin reproducing in less than 24 hours, attaching to other areas in your home. It slowly eats away at porous surfaces, such as plaster and wood, weakening the area over time.

Not only does it affect the structure of your home, but as it’s an airborne fungus it also can affect your health. When the spores are floating through the air, they can easily make their way into the respiratory systems of those living in the house. This can cause allergies such as sneezing and watery eyes, make it difficult to breathe, trigger asthmatics or even turn into respiratory infections. It doesn’t matter whether you can remove the mould yourself or need a bit of extra help from the professionals, as long as it gets done!

Step 1: Figuring Out the Cause of the Mould

The first step to eliminating the mould is addressing what is causing the mould. The most common causes of mould are:

  • Poor ventilation
  • Water damage
  • Limited natural light

If water damage is the cause of the mould, that is something you need to get fixed immediately to prevent further damage. When it comes to water damage around your ceiling it’s important to check there are no holes in your roof or leaking pipes. Once you’re sure water damage isn’t the cause, it’s time to evaluate the space.

Mould thrives in poorly ventilated spaces that don’t have much access to natural light. In some places, it’s hard to increase natural light but making sure window curtains are open daily can make a positive impact when limiting mould growth. When it comes to ventilation, simply leaving the door to the room open or opening a window slightly can stop mould growth in the first place.  

Step 2: Create Your Solution

mould cleaner for ceiling

The first thing people tend to grab when looking to remove mould is bleach. Bleach can be a harmful chemical, particularly when it comes to your health. We recommend trying a more natural solution created from just vinegar and water. Vinegar is a versatile product that the majority of people already have in their homes. If you’re thinking you need to use something stronger such as bleach, it could be a signal that you need to call in mould removal professionals.

To create your solution to remove mould from your ceiling all you need to do is mix equal parts of water and white vinegar. It’s as easy as that! Now that we’ve got the solution ready to go, it’s time to get into removing the mould from the ceiling.

Step 3: Remove Mould from Ceiling

removing mould from ceiling

In this part, you need to be careful completely. When using a ladder, it’s important to follow all of the necessary safety precautions, particularly having someone hold the ladder for you whilst you’re using it. To remove the mould from the ceiling you’re going to want to start by soaking a microfibre cloth in your solution. When you pull it out you want to wring out all the excess solution. You should be able to wipe this cloth over the area affected by mould in circular motions and it should come off easily without too much effort. Once you’ve removed the mould, wet a clean cloth, and remove the excess solution before drying the area.

What To Do If the Solution Doesn’t Work

If this simple solution doesn’t work, you don’t need to immediately run out and buy numerous mould removals from your local supermarket. Store-bought mould removers don’t typically work that well, so if the mould isn’t being removed with the vinegar solution it may just mean you need more help.

Our team of mould removal experts are only ever one call away. Not only do we have years of experience removing mould from all sorts of locations, but we also have access to commercial-grade products and equipment to get the job done quickly and efficiently. Whether it’s only a small amount of mould in one room, a mould infestation spread throughout the entire home or even the water damage causing the mould, we can help.

Make your home safe again, contact our mould removal experts for more information today.